Print more using less media
December 06, 2023
Why you need a nesting software for your prepress workflow
How do you achieve the most cost-effective print layout? Certainly not by spending hours manually arranging your images on a design software. In this article, we will present you with a smarter alternative to achieve optimized print layouts while saving time, cutting down on media waste and reducing production costs. What’s not to like?
Don’t underestimate the importance of prepress
It’s an understatement to say that the world of communications is facing many challenges today. How can we factor in sustainability and durability in a sector where the ephemeral is king? There has been a lot of talk about eco-design, circular economy and recycling. Meanwhile, print businesses are looking to optimize their processes. We believe that prepress can play a significant role in that regard! Prepress help to reduce waste and help companies implement more efficient, sustainable production workflows.
In digital printing, prepress refers to the processes and tasks taking place before the actual printing of the design. Prepress involves preparing print files before production, by checking the format, resolution, transparency, fonts, bleed, cut marks, and more. It plays a critical role in ensuring the quality and consistency of the final output.
But there’s another step not to overlook if you want to achieve significant time and media savings— image nesting.
What is nesting, and how does it work?
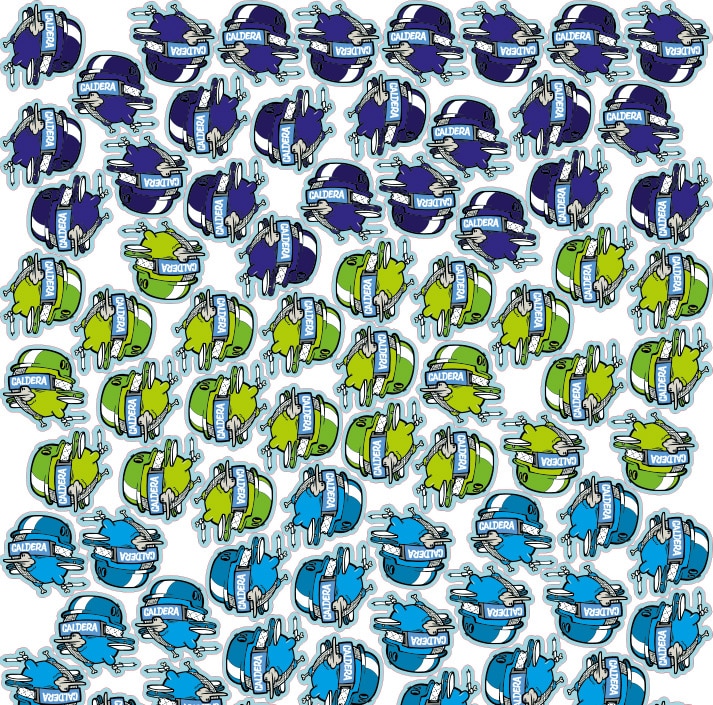
Nesting refers to the process of optimizing the placement of multiple items of different sizes and shapes onto a larger sheet or roll of print media. Nesting together different images that you need to print (and cut) on the same sheet helps to maximize media usage, cut down waste and improve the efficiency of your production.
To learn more about all the different types of nesting strategies, and to understand the difference between nesting and imposition, we recommand you read our dedicated article.
While nesting sounds great on paper, it’s an entirely different story when you have to do it manually via your design software. When you’re printing a series of irregular-shaped items, it’s not always intuitive to arrange the layout by eye.
Manual nesting is a tedious and time-consuming process, and no matter how you align or rotate your images, too often you’re left with useless white space that represents media waste. Over long and multiple print runs, you’ll be left with a substantial amount of frustration, wasted media, and money lost with impacts for your business in terms of sustainability.
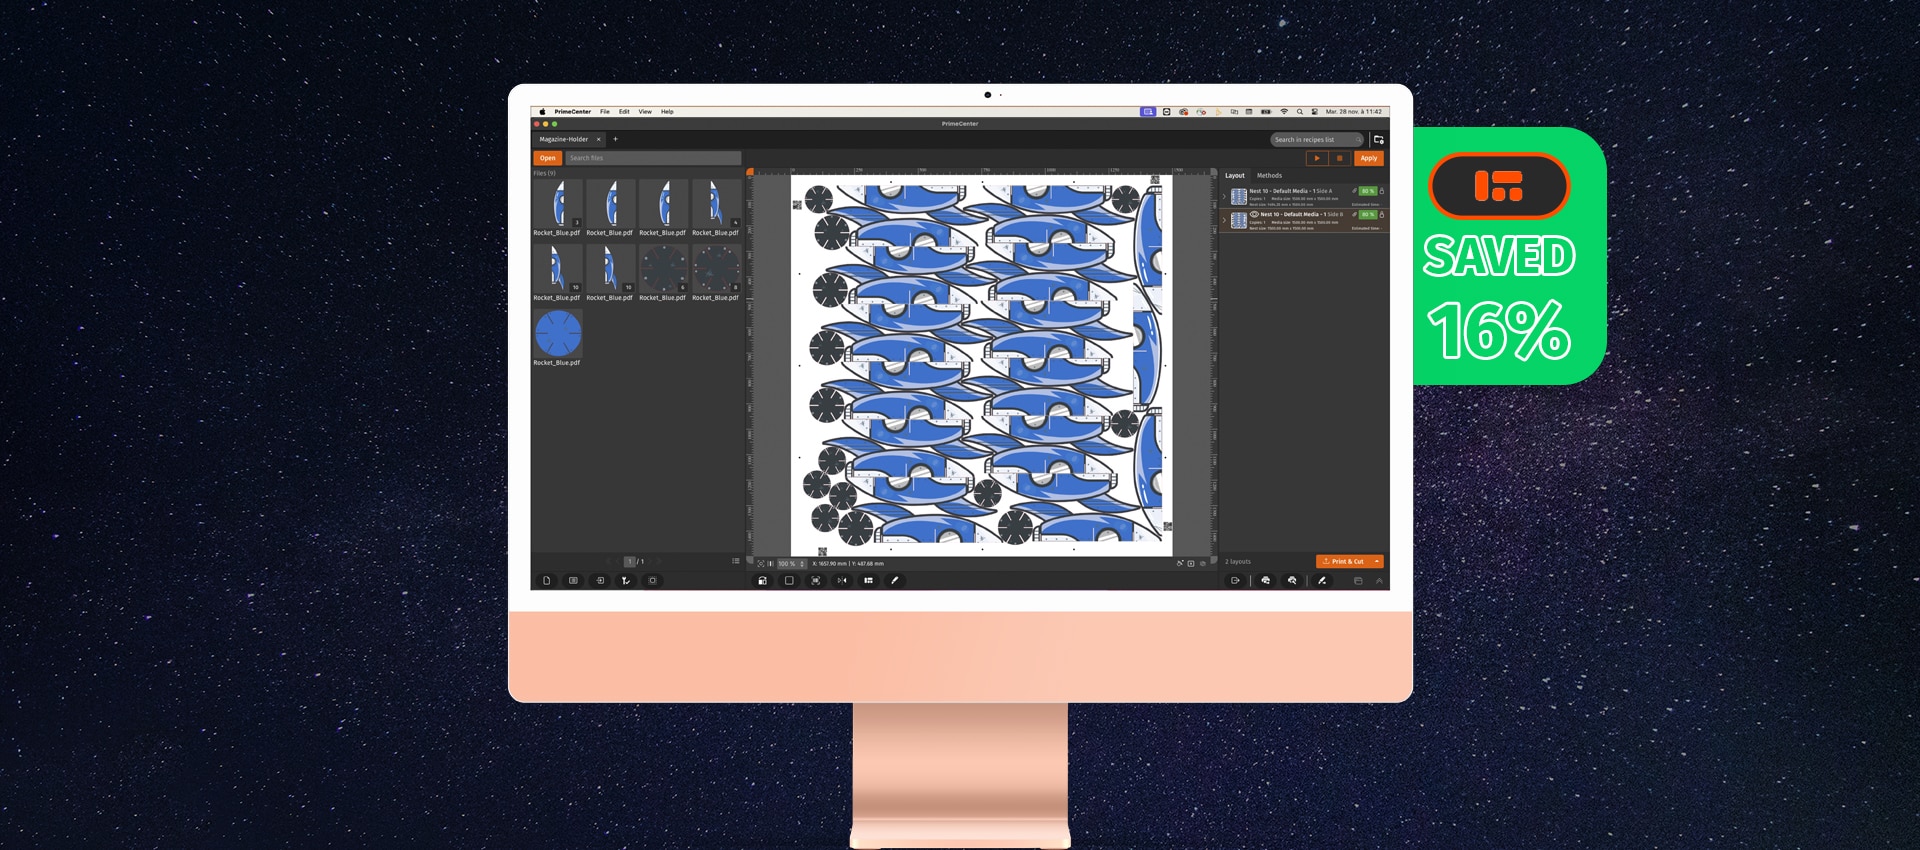
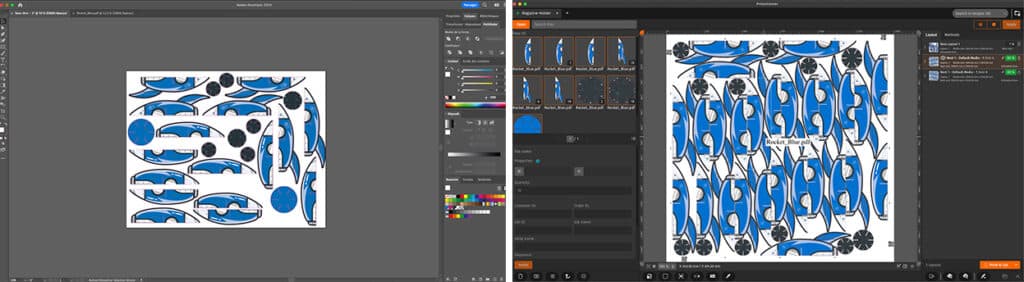
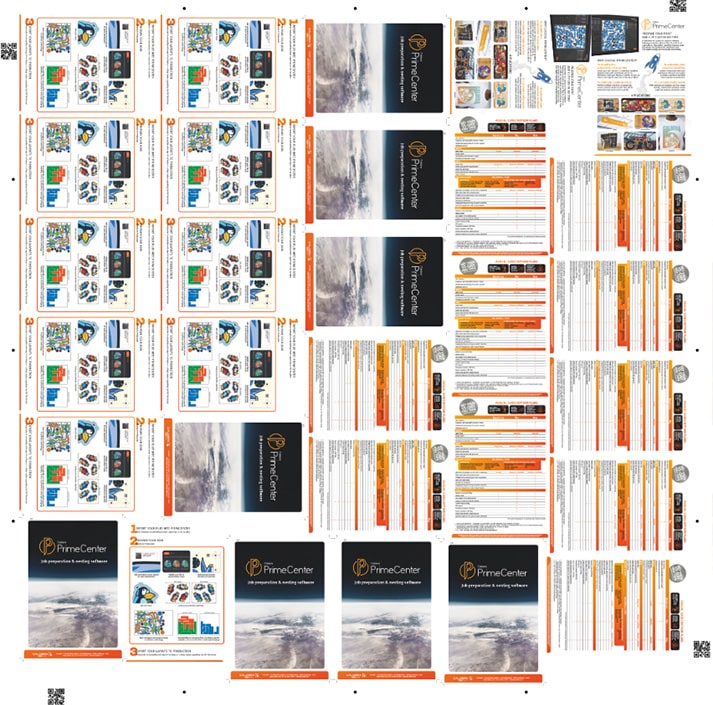
Here’s an example of manual nesting in Adobe Illustrator, versus automatic nesting in PrimeCenter:
However, when it is done via dedicated software (such as Caldera PrimeCenter), the nesting phase can be automated to optimize media usage while factoring in your production constraints. You can include other instructions to anticipate cutting and finishing stages (adding cut contours, cut marks or print bleed). And most importantly, you can nest multiple print jobs on the basis of specific metadata, such as the media type or customer name. And this is how prepress can boost the efficiency of your entire production!
The advantages of using a nesting software
Here are some of the benefits of using a dedicated software to automatically group your files in optimized layouts:
- Automatic nesting reduces media waste by positioning and rotating the images, so they fit the precise width of the media with the minimum amount of wasted space. This is particularly useful for printing multiple items of varying size and dimensions.
- Using advanced nesting features (such as grouping files per customer, or per media type) will help you save significant time during the printing, cutting, finishing and delivery stages.
- Fitting more images on your media optimizes throughput, while minimizing production costs.
- Factor in cutting marks, cut contours, print bleed and annotations directly in your automatic nesting processes to streamline your production.
Nest your files automatically with Caldera PrimeCenter
PrimeCenter is a powerful prepress software used to optimize the preparation of print and cut files. It is ideal for printshops who seek to optimize media usage and printer efficiency.
We created PrimeCenter to help operators in their daily tasks. It allows the user to create custom recipes to automate file preparation for printing and cutting. Recipes include preflight, double-sided printing, cutting options and advanced image nesting.
How does PrimeCenter work?
PrimeCenter integrates in any existing workflow to streamline the preparation of your print and cut files.
- Import the files in PrimeCenter to make them ready for production.
- Create your own recipes to prepare your jobs for production. Recipes include media parameters, preflight checks, print bleed, cut marks, annotations, nesting and output options.
- Once your layouts are done, send them directly to your RIP software, and towards the printing and cutting stages.
Taking a closer look at PrimeCenter nesting
Nest rectangular and complex shapes automatically
Whether you need to nest several copies of the same file, different files of similar format, or a bunch of different images with varying sizes and dimensions, PrimeCenter’s true-shape nesting algorithm is up to the task.
Rectangular shapes
Complex shapes

Rectangular mixed with complex shapes
Nest and group files according to specific metadata (ganging)
Depending on your processes and production constraints, you might need to group files depending on the customer or the media type.
In that case, PrimeCenter’s ganging feature will adapt to your needs, and separate files in different nests. Finishing and delivery will be made easier, as you won’t need to sort all your printed products manually.

Prioritize specific jobs in your nests
When nesting or ganging files, you can define an order of priority inside your nests in order to prioritize the production of specific jobs.
View and compare the media coverage of your layouts
All nested layouts automatically display a media coverage percentage to help you monitor media usage. You can use different nesting strategies and parameters, easily compare the layouts and define which one is best suited for production.
Get your free trial of PrimeCenter
Want to save time preparing your files?
Contact us for a custom demo with our specialists and to start your free trial!
Related articles